Showing posts with label Recipe. Show all posts

Friday, July 9, 2010

Gluten-Free Chocolate Cherry Cupcakes


My mom used to serve a chocolate cherry cake back when we could both eat gluten. The good old days.

But now that Betty Crocker has the devil's food cake mixes, we are making this again. It is so yummy.

1 box gluten free chocolate cake mix (I used Betty Crocker)
1/2 stick butter, softened
1 egg
1 cup water
1/2 can cherry pie filling

Mix cake mix, butter, egg and water according to the directions on the box.

When you open the cherry pie filling there will be cherries and some gel-like stuff. First divide your can of cherries into 2 portions. Scoop out as much of the gel stuff as you can out of one portion and mix it with the cake mix. You can freeze the other half of the cherries and filling to save for the next time you make these cupcakes.

Pour a small amount of batter into each cupcake cup. Place about three cherries on top of the batter and then fill the cup almost until the top. I did this with most of my cupcakes and I think it tastes the best, but I did have trouble getting the cupcakes out of the cupcake holder without breaking. I also experimented with placing the cherries on top of the batter. These cupcakes did not break, but they didn't taste quite the same. Experiment with it and see which works best for you.

Bake per the directions on the cake box. Enjoy!

Friday, June 25, 2010

Gluten-Free Oreo Recipe


There are few foods that I truely miss after going gluten-free. Oreos is on the list though.

Come on, it's a classic. That chocolatey wafter with the yummy cream filling. Who doesn't love oreos?

So I was really excited when I found a recipe for homemade Oreo cookies one day on Smitten Kitchen's blog. Even though it wasn't gluten-free I copied it down thinking I could maybe alter it.

Yesterday I sat down at the computer and did a search for "gluten-free Oreo recipe". Zilch. Zip. Nada.

So I pulled the one on my computer and studied it a minute. The gluten free flour mix I use says that it can be substituted cup for cup for regular flour. What have I got to lose? I really want some Oreos and it's not like I can just waltz down to the store and get some.

So I started baking. This is what I ended up with.


Yep, that is a plate of homemade, gluten free, Oreo cookies. Yum!

They were easy and oh so yummy!

I will give you the recipe, but there are a couple of things I'd do differently next time so I'm going to make some notes on it too. Now don't freak out on me when you read the recipe. They really are not hard at all to make. And the only kind of cooking I like is easy and good. Okay, ready? Here it is!

For the chocolate wafers:
1 1/4 cups all-purpose flour (if you are making this gluten free, I used this flour mix)
1/2 cup unsweetened cocoa
1 teaspoon baking soda
1/4 teaspoon baking powder
1/4 teaspoon salt
1 cup sugar
1/2 cup plus 2 tablespoons room-temperature, unsalted butter
1 large egg

For the filling:
1/4 cup room-temperature, unsalted butter
1/4 cup vegetable shortening
2 cups sifted powdered sugar
2 teaspoons vanilla extract

As always, if you are baking these gluten-free please verify each of your ingredients is gluten-free before starting.

1. Preheat oven to 375F.


2. In a medium sized bowl, mix the flour, cocoa, baking soda and powder, salt, and sugar, then beat in the butter, and the egg. Continue mixing until dough comes together in a mass. This is where I made my first mistake. Maybe you all know this, but if you put all the dry ingredients in a bowl and then add the butter and egg when you start to beat it the cookie mix will explode out of the bowl and all over the counters. Very messy. (Don't ask me how I know this, I just know.) Next time I will cream the butter and egg and then slowly add the dry ingredients.


3. Take rounded teaspoons of batter and place on a parchment paper-lined baking sheet approximately 2 inches apart. With moistened hands, slightly flatten the dough. Bake for 9 minutes, rotating once for even baking. Set on a rack to cool. If you read my other recipes you know I don't follow directions very well. So I had to experiment. For about 2/3 of my cookies I rolled out the dough and used a round cookie cutter. I put the dough between 2 sheets of waxed paper and rolled it out thick 1/4-1/2 inch). The cutter is about the size of a regular Oreo. If you do this, be aware that your cookies will still spread and leave room on the pan for this. Otherwise you will end up with one giant cookie. These took about 7 minutes to cook. The rest of the cookies I used a cookie scoop and then flattened them slightly.


4. To make the cream, place butter and shortening in a mixing bowl, and at low speed, gradually beat in the sugar and vanilla. Turn the mixer on high and beat for 2-3 minutes until filling is light and fluffy. I used butter flavored Crisco as my shortening and it turned my cream yellow although it came out white in the pictures. Just a note in case that kind of thing would bother you.


5. To assemble the cookies, in a pastry bag with a 1/2 inch, round tip, pipe teaspoon-size blobs of cream into the center of one cookie. Remember when I said not to freak out? Okay good, keep reading. Place another cookie, equal in size to the first, on top of the cream. Lightly press, to work the filling evenly to the outsides of the cookie. Continue this process until all the cookies have been sandwiched with cream. I don't have a pastry bag and I don't know how to pipe. That would be in direct opposition of my love for easy cooking. I tried just spooning the icing on the cookies, but it was kind of messy and didn't work well. So I loaded the icing in a ziplock bag and smooshed out all the air I could. Then I sealed the bag and cut off one of the lower corners. I squeezed the icing out of the hole into blobs on top of half of the wafters. Much easier than the spooning method. I got all the icing on in less time than it took me to load up the baggie.


The Verdict


Oh-my-goodness-these-cookies-are-awesome! Someone pass the milk.


I love them. The ones that I made with the cookie cutters were much thinner and more Oreo-like. The ones that I scooped and flattened ended up about an inch thick in the end (with filling and all). Now initially that sounds like a good thing, but ends up being a little much. If I try that method again I will have to flatten them out more. And maybe try a smaller scoop.


They do not taste like they are gluten free. I gave one to a friend who stopped by this morning (who is not gluten-free) and she declared them to be "better than Oreos!"


Oh, and because this is how my life works.... As the cookies were cooling I found a gluten-free adaptation on the web. It's very similar to the one I used and if the gluten free flour blend you are using does not already contain xantham gum, I would follow her suggestion to add 1/2 t of Xantham gum.

Thursday, June 24, 2010

Jules Gluten Free Flour Blend

I refer to this gluten-free flour blend a lot when I am baking. It is my go-to flour for most of my baking recipes. It's easy to make and I keep a container of it stocked in my pantry and ready to go. I make double batches because I tend to go through it pretty quickly.

Just a quick reminder to always read the labels on every ingredient you use if you are cooking gluten free. I try to point out potential hazards but manufacturers make changes quickly and often so you always need to double check.

Jules Nearly Normal Flour Mix*

• 1 cup white rice flour
• 1 cup potato starch (not potato flour)
• 1 cup cornstarch
• 1/2 cup corn flour
• 1/2 cup tapioca flour or tapioca starch
• 4 teaspoons xanthan gum

*recipe reprinted with permisssion

If you don't want to make your own flour mix it is available by mail-order. You can visit Jules' website at JulesGlutenFree.com for more information. She also has a lot of free gluten-free recipes.

Friday, June 18, 2010

Making Hostess Cupcakes


I've been debating whether this little tip is even blog-worthy. It's such a simple little thing.

My mom, who also has Celiac, used to love Hostess cupcakes. Now that she has to eat gluten free, they are off-limits. She came up with this little trick to make these gluten free cupcakes at home. I think you could also do this with regular cupcakes.

1 box Betty Crocker gluten free cake mix
1 stick of butter
1 cup water
3 eggs
Marshmellow fluff.

Make your cake mix according to the directions on the box, or you could use my slightly healthier version of making this mix.

Put a small amount of cake batter into each cupcake tin. Add a generous dollop of marshmellow fluff and top with remaining batter. Bake as directed.

The marshmellow fluff will rise to the top, but the taste is remarkably close to Hostess Cupcakes.

And just a side note, I tried to duplicate her results by using marshmellows instead of fluff. It was not nearly the same. I just thought it would be easier. Next time I'll just use the fluff

Friday, June 11, 2010

Summer Spaghetti


This is one of those a-little-of-this and a little-of-that recipes. The kind that's hard to translate into something on paper for another person to be able to follow. But summer's coming, and so are the fresh tomatoes. The tomatoes in my garden are starting to flower and I am looking forward to being able to make summer spaghetti again. Since fresh tomatoes are the base you really need home grown ones, not the kind you buy at the supermarket.

Summer Spaghetti

One large tomato peeled and cut into bite sized chunks
2t oil
2T vinegar (I've used red, white, balsamic and a mixture of the three)
2 cups cooked pasta (you can use gluten-free pasta for this)

--------------
Okay, those are all the essentials for this dish. But there are lots and lots of things that you can add to make it taste better depending on what you have in the fridge, how much time you have and what you like to eat. Here are some of my favorites...

Sliced black olives
1/2 inch chunks of sweet pepper
1/2 inch chunks of cucumber
minced garlic
Thinly sliced onion
--------------

Mix tomatoes, oil and vinegar together in a bowl. For a dish with more bite to it, let the tomatoes marinade in the vinegar and oil for up to a day before serving. Add olives, sweet pepper, cucumber, garlic and onion. Serve over cold cooked pasta. Mmmmm...

Friday, June 4, 2010

Chocolate Cake Mix Experiment


I had a couple of the Betty Crocker Devil's Food Cake mixes in my cupboard and I wanted chocolate last night like crazy. But as any of my reader's know by now, I really have trouble following a recipe. It's not that I can't, but I don't want to be limited by the directions on the box.

But since it was a success I thought I'd share.

In the freezer I had a couple of cups of cherry puree. This is a mix of fresh spinach leaves and frozen cherries pureed together. I don't remember the ratio, but maybe I'm guessing roughly half and half. (This would be no fun if I remembered everything, now would it?) So I made up a new recipe.

1/2 cup water
2 eggs
1 cup cherry puree
1/2 stick of butter (softened)

Combine all ingredients. Once combined mix on medium speed for 2 minutes.

Bake according to directions on the box. Check your cake a little sooner than the directions say to. Mine was done in 30 minutes in a 9 x 9 pan.

I was hoping the cake would taste like a cherry chocolate cake, but it really didn't. It was moist and chocolately and yummy though! And the best part was that I cut out 1/2 of the butter and 1 egg that the recipe called for. And I replaced it with fruits and veggies! Much healthier and I thought it tasted better than the way it is supposed to be prepared.

Friday, March 12, 2010

Chex Treats


Since going on the gluten free diet I've had to give up Rice Krispy treats. Rice krispies seem like a cereal that would not have gluten, but they add a small amount of malt to it which makes it off limits to me.

But seriously, I want to make these with my son. I want to eat them too. I have childhood memories of the ooey gooeyness of the marshmellows melting and I want to pass it on.

My friend hit up on a brilliant solution. Substitue Rice Chex for the Rice Krispies. Why didn't I think of that?


Here's the recipe.

6 cups of Rice Chex
4 cups mini marshmellows
3 T butter

Melt butter over low heat. Add marshmellows and stir frequently until marshmellows melt. Pour into a greased (or sprayed) 9 x 13 baking dish and press down into an even layer. Let cool before eating.

We had a good time making the treats. I had 2 helpers. My official taste tester and my offical cutie pie.


Oh my, these were so good! My little helper (Doodlebug's friend who was staying with us that day) declared loudly, "I love this treat!" I couldn't have said it better myself.

Friday, March 5, 2010

Spinach Salad


Unless I’m baking, I don’t really follow recipes all that well. It’s not that I can’t, I just don’t. I can’t be bothered to measure out teaspoons of ketchup or cups of chicken broth. I sometimes discover I’m out of an ingredient ¾’s of the way through a recipe. I am lazy. Why drag out the food processor to grate an apple when I have perfectly good applesause sitting in the fridge. Those are about the same.

For sheer entertainment I’m going to write out this recipe along with the thoughts that go through my head as I am typing it out. This is not for the faint of heart.

Spinach Salad (I know it sounds really gross, but if it makes me want to eat spinach, it’s got to be pretty great. Trust me. I know what I’m talking about. I am a very picky eater.)

2 cups raw baby spinach (The ‘experts’ always tell people to wash their spinach. Should I mention that? I mean, this is a recipe not a cooking lesson. And that would be kind of hypocritical since I never wash mine.)

2 T vegetable oil (Seriously, I have no idea how much oil to use. I just pour a little in the pan. 2T sounds like a good amount though. And who’s really going to measure it anyway?)

½ minced onion (Or maybe a little less. Heck, just use whatever’s hanging around in the fridge. It’s just about adding some flavor anyway.)

2T brown sugar. (I think it’s supposed to be the same as the oil. Maybe not. I can’t remember. Just throw some it.)

½ cup Mandarin oranges (That sounds about right. Assuming you have Mandarin oranges. Last week I didn’t so I used dried cranberries. It was pretty tasty. Maybe I should change it to cranberries. Or both. I bet it would be good with both. I’d better remember to add both to the grocery list for next week. And spinach. I won’t get far without the spinach. Is there anything else we need from the grocery…? Wait, what was I doing? Oh yeah, typing up a recipe. Where was I?)

¼ almonds. (Use whatever nuts you have that seem to go with the other ingredients. Throw in what you want. Seriously. It’s not that hard.)

Heat oil in a small pan. Add minced onion and cook until translucent. (I hate using that term. When are the onions translucent? No idea. But it’s better than trying to figure out how long I actually cooked them last time. As long as they aren't burnt you will be okay.)

Take pan off the heat and add in brown sugar. (I know, it sounds insane. But think of it like dressing. It really does taste good. Promise. Cross my picky-eater’s heart.) Stir until well combined. Pour mixture over the spinach. Toss well to coat. (You’re gonna be standing there tossing for a few minutes. It doesn’t look like it’ll be enough, but it is. Promise.)

Top with Mandarin oranges and almonds. (Oh so healthy, and thanks to the sugar, oh so yummy too. I wonder what other fruits and nuts would work here.)

Friday, February 26, 2010

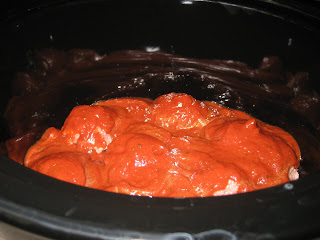
Super Saucy Pork Chops


I can't remember where this recipe came from originally, so if anyone recognizes let me know so I can credit the creator of this yummy dish. We haven't had it in a while, we've been out of pork chops and they haven't been on sale. Finally this week they are on sale so I'm planning to have these soon.

2 pork chops (fat trimmed and bone removed)
14 oz can of peeled, crushed tomatoes
1/4 cup brown sugar
1 T vinegar
1 t garlic powder
1/4 cup chopped sweet onion
1 T molasses
1-2 cups cooked pasta (if you are going gluten-free use a gluten-free pasta here)

1. Pour tomatoes in blender and pulse to break up tomatoes. We like ours just a little chunky.

2. Combine all ingredients in a crock pot, except pork chops and pasta, and stir.

3. Place pork chops on top.

4. Cook for 6-8 hours on low.

5. Serve over pasta.

This makes enough for my husband and I to eat for dinner with enough leftover for the next days lunch.

Friday, February 19, 2010

Mexican Chicken Soup


We don't do many soups in our house. Neither my husband or I especially enjoy them but we do have a couple of recipes we pull out from time to time. This is one of my favorites because it is very flexible, quick and yummy. It's also a great way to use up leftover cooked chicken.

Ingredients

Boneless, skinless chicken (This can be cut into cubes now, or shredded with a fork after cooking.)
1 can Mexican tomatoes
1 cup chicken broth (If you are making this gluten free be sure the chicken broth is gluten free.)
1 stalk of celery cut into small pieces
1 cup of frozen or canned corn
1/2 cup frozen green beans cut to about 1" long
1 t cumin
2 t minced garlic

Puree tomatoes to break up most of the chunks. Combine all ingredients in crock pot and cook on low for 6-8 hours or high for 3-4 hours.

I have done all sorts of combinations in this soup. When I haven't had Mexican tomatoes I've used regular tomatoes and added some salsa. Sometimes I brown the celery and garlic before adding it to the crock pot. I have used this recipe with both raw and cooked chicken and it works either way. I omit the celery when I don't have it. When I'm reheating it I will often mix in some shredded Mexican cheese. It's a pretty flexible dish with very little prep work.

Friday, February 12, 2010

Yogurt in the Crock Pot


Yogurt can be really expensive. Especially when you are looking for the kind that doesn't have a lot of sugar or artificial sweeteners in it. And then if you want organic yogurt you'd better go get a home equity loan. Of course, Doodlebug loves yogurt.

I was shocked to discover that you can make your own yogurt at home. And I was even more amazed to find out that you can make it in your crock pot. Who knew?

But it must be really complicated, right? Nope! It is so, so, so easy. The hardest part for me is remembering to start it in time.

Ingredients

--8 cups (1/2 gallon) of milk
--1/2 cup of store bought* plain yogurt with live and active cultures

Directions

Put the milk in the crock pot. Turn crock pot on low and let cook for 2 1/2 hours.

After the 2 1/2 hours unplug your crock pot and let sit for 3 hours.

After sitting scoop out 2 cups of warm milk, put the lid back on the crock pot and wisk the milk together with the store bought yogurt.*

Pour the milk/yogurt mix back in the crock pot and stir to combine. Put the lid back on the crock pot.

Wrap your entire crock pot in a bath towel to insulate it and leave 8-12 hours.

Presto, you have yogurt!

Put the yogurt in the fridge and it should last 7-10 days. You can also freeze excess yogurt. I ladel it into zip top sandwhich bags and store in the freezer. Even if you freeze it you can use it to start your next batch of yogurt.

If you freeze your yogurt it will separate. You can either mix it back together or pour off some of the clearish liquid (whey) if you want thicker yogurt.

When you first make this yogurt it will be very thin. If you want thicker yogurt you can line a collander with a coffee filter and spoon the yogurt inside. Let it sit over a bowl for a few hours. It will gradually thicken up.

The yogurt will be more tart than store bought since there is no added sugar. You can add honey, fruit or whatever else strikes your fancy.

* for future yogurt making you can use 1/2 cup of your crock pot yogurt instead of store bought

And I have not tried this variation, but I plan to next time I have a little leftover milk.

Boil one cup of milk and let it cool to room tempature. Stir in 1 tablespoon of yogurt and let it sit, without moving, overnight. In the morning you will have yogurt.

Friday, February 5, 2010

Turkey Meatballs


It can be a little tricky trying to cook at the end of a long day with an infant. I decided to pull out our crock pot and start trying all the crock pot recipies I could find. This one had been saved in a file for a long, long time. It sounded good, but also a little odd. I just wasn't sure if I would like it. Well after making it I discovered that I don't like it. I love it! I was astonished that meatballs put in the crockpot raw actually browned, but they do.

This recipe tastes even better the next day and freezes really well if you happen to have any meatballs left over. Mmm...turkey meatballs.

Turkey meatballs

Ingredients

--1 1/2 pounds ground turkey
--1 egg
--1 tsp kosher salt
--1 tsp ground black pepper
--1 ½ t poultry seasoning
--1/2 onion, finely chopped
--1 cup natural applesauce or 1 peeled and finely chopped apple
--1/2 cup shredded sharp cheddar
--1/2 cup dried unsweetened cranberries (optional)

Directions.

In a large mixing bowl, mix the ground turkey with the rest of the ingredients.

Make golf-ball sized meatballs, and drop them into your crockpot. It’s fine to stack them on top of each other.

Cover and cook on high for 4-5 hours, or on low for 5-9---the cooking time will depend the number of meatballs and the size of your crockpot.

Friday, January 29, 2010

No Noodle Lasagna


A couple of years ago, before I developed Celiac, I was trying to reduce the amount of refined flour and sugar in my diet. Since it was summer and zuchini was plentiful I decided to try to use it in place of noodles in lasagna. Much to my suprise, it worked! I really never missed the noodles and the zuchini blends in nicely with the tomatos and cheeses. Now that I can't have traditional lasagna noodles this has become a staple in my kitchen.

I do need to warn you that this gluten free lasagna does not cut into neat little squares. When it it hot and the lasanga is cut up it will spread over your plate. If you like it to be a little neater cook it the day before you need it. The leftovers always taste better and look better than the day it is served.

No Noodle Lasagna

1 lb ground beef (also works well with 1/2 lb ground beef and 1/2 lb ground pork)
¾ cup chopped onion
Cooking spray
1 can tomatoes
2 small cans tomato paste
½ cup water
1 T parsley
2 t salt
1 T sugar
1 T garlic powder
½ t pepper
½ t oregano
2-3 small zucchini
1 lb cottage cheese
4 cups mozzarella cheese


Cut zucchini into thin rounds and steam cook in the microwave for 2-3 min. Brown ground beef together with onion. Mix together with rest of ingredients except zucchini and mozzarella cheese. Layer a little sauce on the bottom of a 9 x 13 baking dish coated with cooking spray. Add a layer of zucchini rounds, cheese then sauce. Repeat until you have 2-3 layers ending with mozzarella cheese on top. Bake at 350°for 40-50 min.

Friday, January 1, 2010

Gluten Free Bread that Tastes Good


Really Good Gluten Free Bread It sounds like a contradiction in terms. Good and gluten free bread doesn’t it? I haven’t eaten much bread in the past two years since I found out I have Celiac. Why spend $6.00 for a loaf of bread that tastes awful? Why spend my time making homemade bread with a dozen exotic flours for it to taste like cardboard?

But I really wanted garlic bread. And a grilled cheese sandwich. So I decided to try making bread at home. I like to bake. This could work.

My recipe requirements were only that it could not contain any flours that I did not already have in my kitchen. It is really frustrating to buy a box of flour for a recipe that I end up not liking anyway.

I found a bread recipe that looked promising here.

Of course, I don’t have a bread maker or all of the flours listed in this blogger’s all purpose flour. So I started making substitutions.


This is the recipe that I am using now, and I love it!

1 package (or 2 ¼ t) active dry yeast
1 Tbsp. sugar
1 1/3 c. water (105 degrees or a little less than hot)
2 ½ cups Jules Nearly Normal Flour Mix
2 tsp. xanthan gum
1 tsp. salt
2 eggs
1 ½ Tbsp. oil
1 tsp. white or rice wine vinegar

1. Combine yeast, sugar and water in a small bowl. Set aside.

2. Combine the flour mix, xanthan gum and salt in a large mixing bowl and mix well.

3. In a third bowl, whisk the eggs, oil and vinegar until the eggs are a bit frothy.

4. Check the yeast. By now, it should look a bit frothy on top. This is an indication your yeast is working well.

5. Pour both liquid mixtures into the flour mixture. Stir until all ingredients are well mixed. It’s important not to undermix the dough. I put my in my mixer and turn it on for at least three minutes.

6. At this point the dough will resemble a thick cake or brownie batter. It will not form into a loose ball like dough using gluten.

7. Pour dough into an oiled 2 cup bread pan and smooth the top.

8. Cover bread dough with plastic wrap and allow to rise until it just reaches the top of the bread pan.

9. Bake at 375 for 50-60 minutes. The top of the bread will be a golden brown and will sound hollow when tapped.

10. Allow bread to cool in the pan for 10 minutes and then place on a wire rack to finish cooling.

11. When fully cooled slice with a serrated bread knife.

Gluten free bread is much more tempermental than it’s gluten containing counterparts. Even the best bakers will occasionally have loaves that turn out hard or fall. Since gluten is what gives bread structure making gluten free bread often has some issues with shrinking or collapsing after coming out of the oven.
If your bread is collapsing and has large air pockets in it, this is a sign you are using too much liquid. Cut back on the liquid in the recipe until you have a more stable loaf with small even air pockets throughout. You can see in my picture above that I have some rather large air pockets and I may need to cut back slightly on my liquids.

Most gluten free cooks like to vary recipes. If you do this, take it one step at a time. It’s generally not a good idea to cut back on liquid, change the type of vinegar, use a different sized loaf pan and substitute guar gum for xantham gum all in the same recipe. If your loaf does not come out as you had hoped you have no idea what you need to change to get back on track.


Friday, December 18, 2009

Mmm...Meatballs for Dinner


Ever wish you had a personal chef? Someone you could call in the morning and say, "I'm in the mood for spaghetti and meatballs tonight. Could you please have that ready at six o'clock? I may not have the personal chef, but I have the next best thing, my crock pot.

Now I know what you're thinking, "A crock pot? What is she, crazy? That's not anywhere close to having a personal chef." Ah, and that last statement is where you would be wrong. I am in serious love with my crock pot. Since my son was born I can find odd snatches of time to cook, but rarely time for a time consuming project like making meatballs, frying them and then putting them in sauce to cook for several hours. But my crock pot solves that problem for me.


When I have a few minutes early in the day I mix up the meat and other ingredients. Then I throw it in the crock pot raw and by dinner time I have spaghetti and meatballs. Mmm, it's a wonderful comfort food and so easy to make.

I make my recipe fairly small since it's just for my husband and I. This makes enough for our dinner (served over spaghetti) and a couple of lunches for me.

1/4 lb ground beef
1/4 lb ground pork*
1/4-1/2 t Nature's Seasoning
1/2 small onion minced**
1 egg
dash of salt
dash of pepper
2 cups spaghetti sauce
1/2 package of spaghetti cooked***

Mix all ingredients together in a medium bowl. When throughly mixed shape meat into balls slightly larger than a golf ball and place in the bottom of the crock pot.


Pour the spaghetti sauce over the meatballs and cook for 6-8 hour on low or 3-5 hours on high. Serve over spaghetti.***


*can substitute all beef, all ground turkey or turkey and pork together
**or can substitute 1/4-1/2 t onion powder
***as long as spaghetti is gluten free this can be a gluten free meal

Sunday, December 13, 2009

Homemade Snapple

We have elves. Or maybe gremlins. Or very hungry caterpillars. I'm not sure which. But they live in my pantry and keep eating one ingredient out of each recipe I want to make.

I'm pretty sure it's not my husband or Doodlebug. What person would finish off the white rice flour or eat a can of tomato paste?

I wanted to try a homemade Snapple recipe I saw this week somewhere. So I heated up some water, stuck a tea bag in it and went to the fridge to get out the juice. But there was no juice. Arg! The hungry caterpillars struck again. Hmm, is there anything I can use? Ah, frozen juice concentrate, that'll work.

I keep some frozen juice concentrate on hand for recipies that call for a little juice. Lots of my crock pot recipes say to add 1/4 cup of apple juice or something similar. If we don't have any regular juice I just scoop out a little of the concentrate, add a little water and use that instead.

I put about 1/2 spoonful of orange juice concentrate and a bunch of crushed ice in a large mug. Once my tea was done I poured it over the ice. The ice melted very quickly and my drink was cool, although not cold. I added some Splenda to sweeten it up a bit and took a sip. It really does taste like Snapple. In fact, I think I need to go and make myself another cup.

Tuesday, December 8, 2009

Baking

Lately I have been obsessed with baking. I don't know why. Since I was diagnosed with Celiac and I can no longer have wheat I haven't baked much. Of course, lots of gluten free baked goods are not worth eating. They leave a gritty texture in your mouth, taste funny or don't look right. Which is a real bummer after you mix up 4 or 5 different flours that all cost WAAAAAAAAY more than regular old wheat flour.

My latest success was with cut out cookies. Yum! I stopped at this website and was pulled in by the photo. These really looked like the cookies I remembered from my childhood.

Now I have to confess that as a kid the only thing I wanted to do was decorate the cookies. And not with icing, where's the fun in that? Sprinkles. Tons and tons of sprinkles. The color sugar kind, the little round ones, jimmies, any kind of sprinkles.

And the worst part was that after the dough was made it had to be refridgerated overnight. Do you know how long that is to a little kid? It might as well be until spring. Ugh.

As an adult I learned to dislike rolling out the dough as well. Flour everywhere, dough sticking to everything and trying to get it all to the same thickness was near impossible.

And yesterday I found a great advantage to gluten free sugar cookies. No putting the dough in the fridge. And rolling it out was a snap. It's not sticky so there's no need for extra flour. I just plunked it on some waxed paper, flattened it out with my hands, and rolled the rolling pin across it once or twice to get it smooth. Easy, peasy. Which just leaves more time for decorating.


Gluten Free Christmas Roll Cookies
Recipe makes 2 1/2 dozen cookies (depending on the size of the cookie cutters)
Ingredients
1/2 cup shortening (I used butter flavored Crisco)
3/4 cup sugar
1 egg
1 teaspoon vanilla extract
2 cups GF flour blend (I used Jules Nearly Normal Flour recipe)
1/4 teaspoon salt
1/2 teaspoon baking powder
2-3 Tablespoons milk

Directions:

1. Preheat oven to 375F. (I confess that I never do this. Once I get the cookies rolled, cut out and decorated, it will be at least another 30 min so I do this much later.)

2. Cream together shortening and sugar until fluffy.

3. Add the egg and beat for 2-3 minutes.

4. In a separate bowl, whisk together GF flour mix, salt and baking powder.

5. Add flour mixture to creamed ingredients and mix until well incorporated.

6. Add 2 – 3 Tablespoons of milk until perfect, non-sticky cookie dough is achieved.

7. Roll out cookie dough to 1/4″-1/3″ thickness.

8. Cut with your favorite cookie cutter and liberally decorate with sprinkles. If there are no sprinkles, what is the point?

9. Bake 6 -7 minutes until the edges just begin to brown. (My oven took 10 min to get to this stage.)

Sunday, September 6, 2009

Pound Cake


I used to bake a fabulous pound cake, then I got Celiac and couldn't have gluten. I tried one gluten free version and it was a total flop. Both literally and figuratively.

But the other day I found a gluten free pound cake recipe on the Land O Lakes website of all places. I just had to try it.

Here is my trusty assitant chef, Doodlebug. Ready for action. He is the chief supervisor of mixing. (He really likes the Kitchen Aid.)


Of course, I had to make a couple of substitions.

The first one was almond extract for the vanilla extract. I just like the taste better.

The second was in place of the 4th egg I used 2 T of cornstarch. I didn't realize that I only had 3 eggs until I was well into the recipe.

I use the recipe for Jules Nearly Normal Flour mix as my flour mix which you can find here.

Here is the modified recipe I used.

2 cups sugar
1 cup melted butter
3 eggs
2 tablespoons cornstarch
4 teaspoons gluten-free almond extract
3 cups Jules Nearly Normal Flour mix *
2 teaspoons gluten-free baking powder
1 cup milk

*Jules Nearly Normal Flour Mix

For the basic flour mix
• 1 cup white rice flour
• 1 cup potato starch (not potato flour)
• 1 cup cornstarch
• 1/2 cup corn flour
• 1/2 cup tapioca flour or tapioca starch
• 4 teaspoons xanthan gum


Heat oven to 350°F. Combine sugar and melted butter in large bowl. Beat at medium speed, scraping bowl often, until creamy. Add eggs, one at a time, beating well after each addition. Add cornstarch and beat well. Add vanilla; beat until well mixed.

Stir together flour mix and baking powder in small bowl. Gradually add flour mixture alternately with milk to butter mixture, beating at low speed until well mixed.

Pour batter into greased and floured 12-cup Bundt® or 10-inch angel food cake (tube) pan. Bake for 50 to 60 minutes or until toothpick inserted in center comes out clean. Cool 10 minutes; remove from pan.

Cut. Eat. Enjoy. Repeat.


Wednesday, August 19, 2009

Chicken nuggets

We had a good-eatin' weekend at our house this past weekend. I've had this recipe for a while (no idea where it came from) and decided to try it, finally. And I was so glad I did.

Chicken Nuggets

2 chicken breasts cut into 1 inch cubes
~3/4 cup crushed potato chips (I used onion and sour cream. If you are making these gluten free don't forget to check the label on the chips.)
1 egg slightly beaten
2 t milk
Cooking spray

Pre heat oven to 375.

Mix together the egg and milk.
Dip the chicken pieces into the egg mixture and then the potato chips.
Lay on a cookie sheet.
Spray nuggets with cooking spray.
Bake for about 15 minutes. The potato chip coating will start to brown when they are done.

Eat and enjoy!

Friday, July 24, 2009

Pizza Sauce


What pizza post would be complete without one for the sauce?

I'm usually kind of lazy when it comes to making my sauce. I don't have a real recipe that I follow, I just throw in whatever I happen to feel like on that day. Here's an approximation of the basis of my sauce.

1 can tomato sauce (8 oz)
1/2 t olive oil
1 t sugar
1/4 t salt
1/2 t powdered garlic
dash of pepper
1/2 t oregano
1/2 t parsley flakes

Mix together in a small bowl. Makes enough to lightly cover 2 pizza crusts.
 
Google Analytics Alternative